Using the iGrafx Mining Knime Extension as a developer
If you are a developer and wish to contribute to the project, please follow the steps below, as they are relatively different from the ones a client would follow. Indeed to modify the project, you must install and use the extension locally.
Requirements
Note that the iGrafx P360 Live Mining SDK is also required and that its installation is explained further in the document.
Download Knime
This extension works with Knime. Please Download Knime to be able to use it. You can find the download link here.
Download Anaconda
To be able to use Python in Knime, Anaconda must be installed, otherwise Python nodes will not be accessible and it will be impossible to use the iGrafx Knime Mining Connector.
You can download Anaconda here.
Getting started
After having downloaded Knime and Anaconda, open Knime. In the top right, you will find a small i icon.
![]()
Click on it then scroll down to Install Extensions. Then, click on the Install Extensions button.

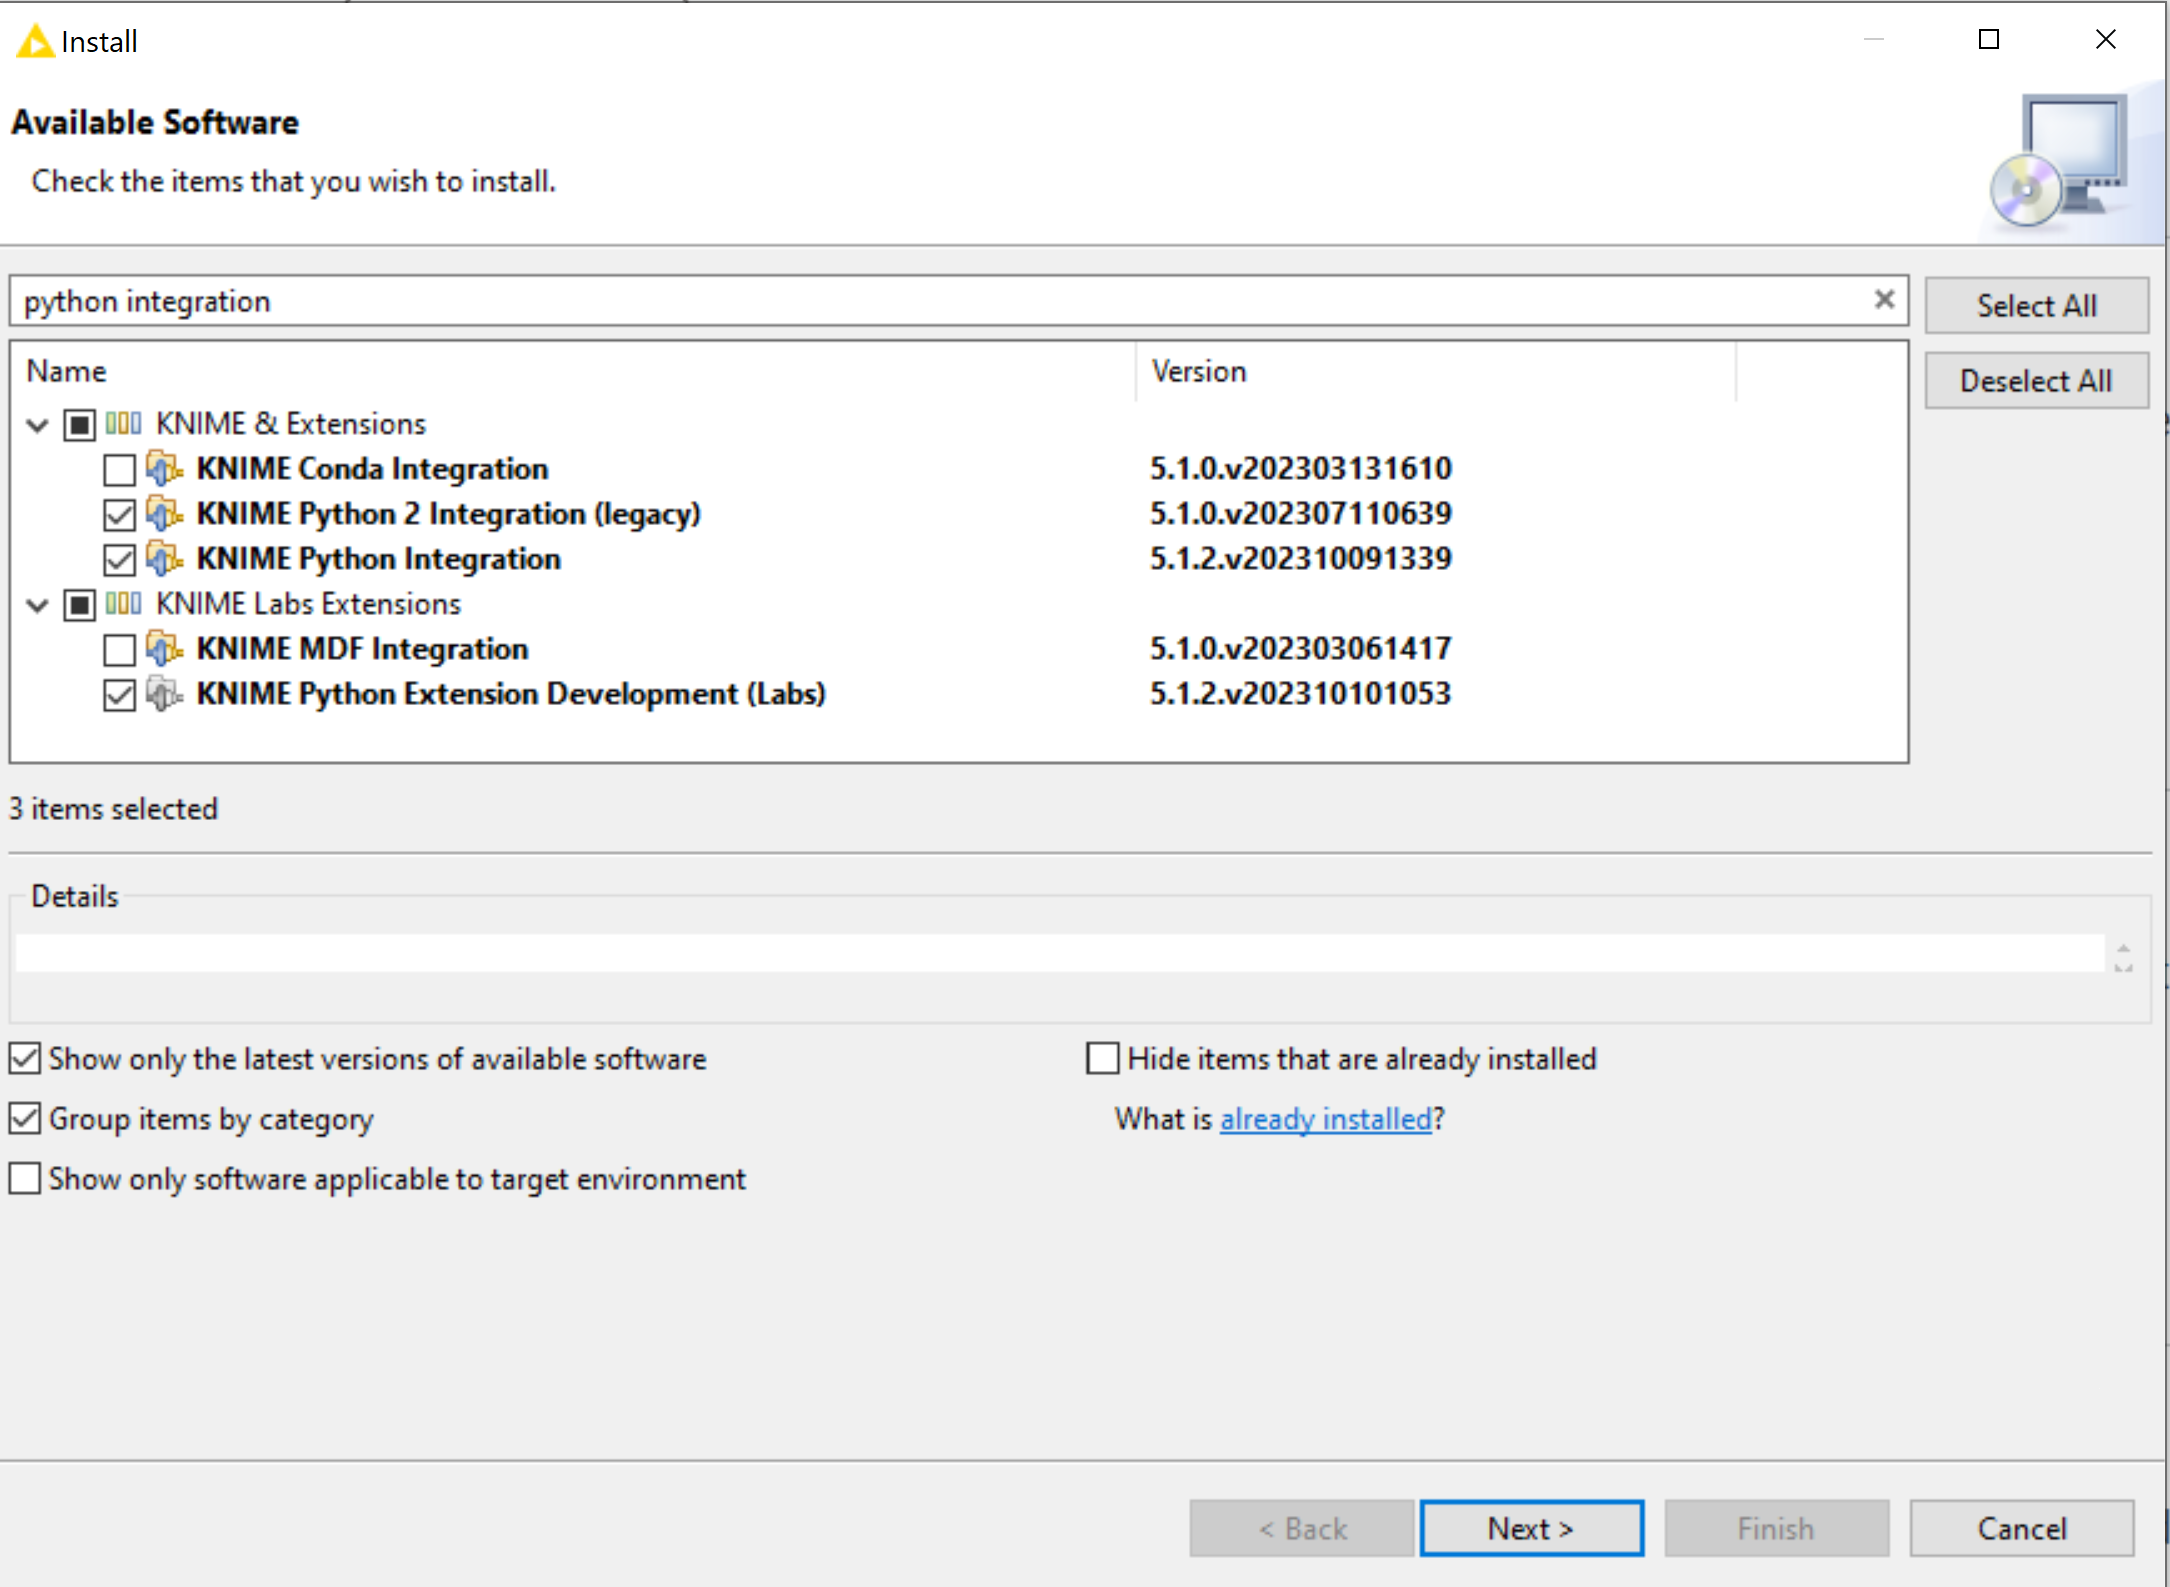
A window will pop up. In the search bar, you can search for Python integration. Tick the following boxes, corresponding to the necessary extensions and click on Finish.
When that is done, configure the KNIME Python Integration. To do so, click on the settings icon in the top right of the window.
![]()
When clicking on it you will see a section called Conda.
Go to that section and browse for your Conda Installation Directory.
When the correct path is entered, the conda version will appear underneath. The path may look like this: C:\Users\Your Name\AppData\Local\anaconda3.
Please note that the path to your Anaconda3 may differ depending on how and where you installed it.

Cloning the iGrafx KNIME Mining Extension
You are going to need the git command for this section.
If you do not have git, please follow the instructions here.
Once everything is Python is integrated in Knime, the first thing to do is to clone the repository. To do so create a new folder. Open a terminal and type the following command:
cd C:\Users\Your\Path\to\New\folder
After having executed the command, do the following command.
git clone https://github.com/igrafx/KNIME-Mining-connector.git
Doing this will clone the iGrafx KNIME Mining Connector Github repository to the new folder you have created. This simply means that the project was copied from Github to your new folder.
Checking the Project Structure
In the igrafx_extension folder, you should see the following file structure:
.
├── igrafx_knime_extension
│ ├── icons
│ │ └── icon.png
│ │ └── igx_logo.png
│ │── knime.yml
│ │── LICENSE.TXT
│ └── igrafx_knime_extension.py
├── config.yml
├── my_conda_env.yml
├── iGrafx_Extension_Example.knwf
└── README.md
Please make sure the structure you have matches the one above.
The igrafx_knime_extension will be your new extension. In it, you will find several elements:
- The
iconsfolder contain the node icons. - The
knime.yml, which contains important metadata about your extension, such as the name, the version, the licence, etc... - The
igrafx_knime_extension.py, which contains Python definitions of the nodes of the extension. - The
config.yml, just outside of the folder, which contains the information that binds the extension and the corresponding conda/Python environment with KNIME Analytics Platform.
Creating a new Conda Python environment
We need to create an environment containing the knime-python-base metapackage and the node development API knime-extension.
To do this, open Anaconda prompt and copy the following command:
conda create -n <Your Environment Name> python=3.9.16 knime-python-base=4.7 knime-extension=4.7 -c knime -c conda-forge
If you would like to install the packages into an environment that already exists you can run the following command from within that environment:
conda install knime-python-base=4.7 knime-extension=4.7 -c knime -c conda-forge
Please note that you must append both the knime and conda-forge channels to the commands to install the mandatory packages.
To install additional packages, for your specific use case, it is better to use the conda-forge channel.
conda install -c conda-forge <additional_pkg_name>
Adding the iGrafx SDK package to the Conda environment
We must now install the SDK package so that we are able to communicate with the platform. Please note that the SDK version must match the platform version to ensure that all functionalities will work.
To do so, open Anaconda prompt.
When the terminal is opened, enter the following command:
conda activate <Your Environment Name>
Doing this will activate the environment you created above and you will then be able to install the package. Finally, you can install the latest the iGrafx SDK with the following command:
pip install igrafx-mining-sdk
This command will install the SDK and all the required dependencies. To avoid issues and conflicts please make sure to download the latest version of the SDK.
If you need to install a specific version of the SDK, use the following command:
shell
  pip install igrafx-mining-sdk==<Your Version>
For instance:
shell
  pip install igrafx-mining-sdk==2.28.0
You can go to the PyPi page of the SDK to check the different versions. You can also to the SDK's Github page if you need additional information about the SDK.
Setting up the Conda Environment in Knime
This section is to set up the Conda environment in Knime.
Open Knime and go to the Settings. Go to the Python tab. Make sure you are in the Python tab and not the Python (Legacy) tab.
Indeed, Python 2 is not used here, so it isn't necessary.
Under Python environment configuration, check Conda.
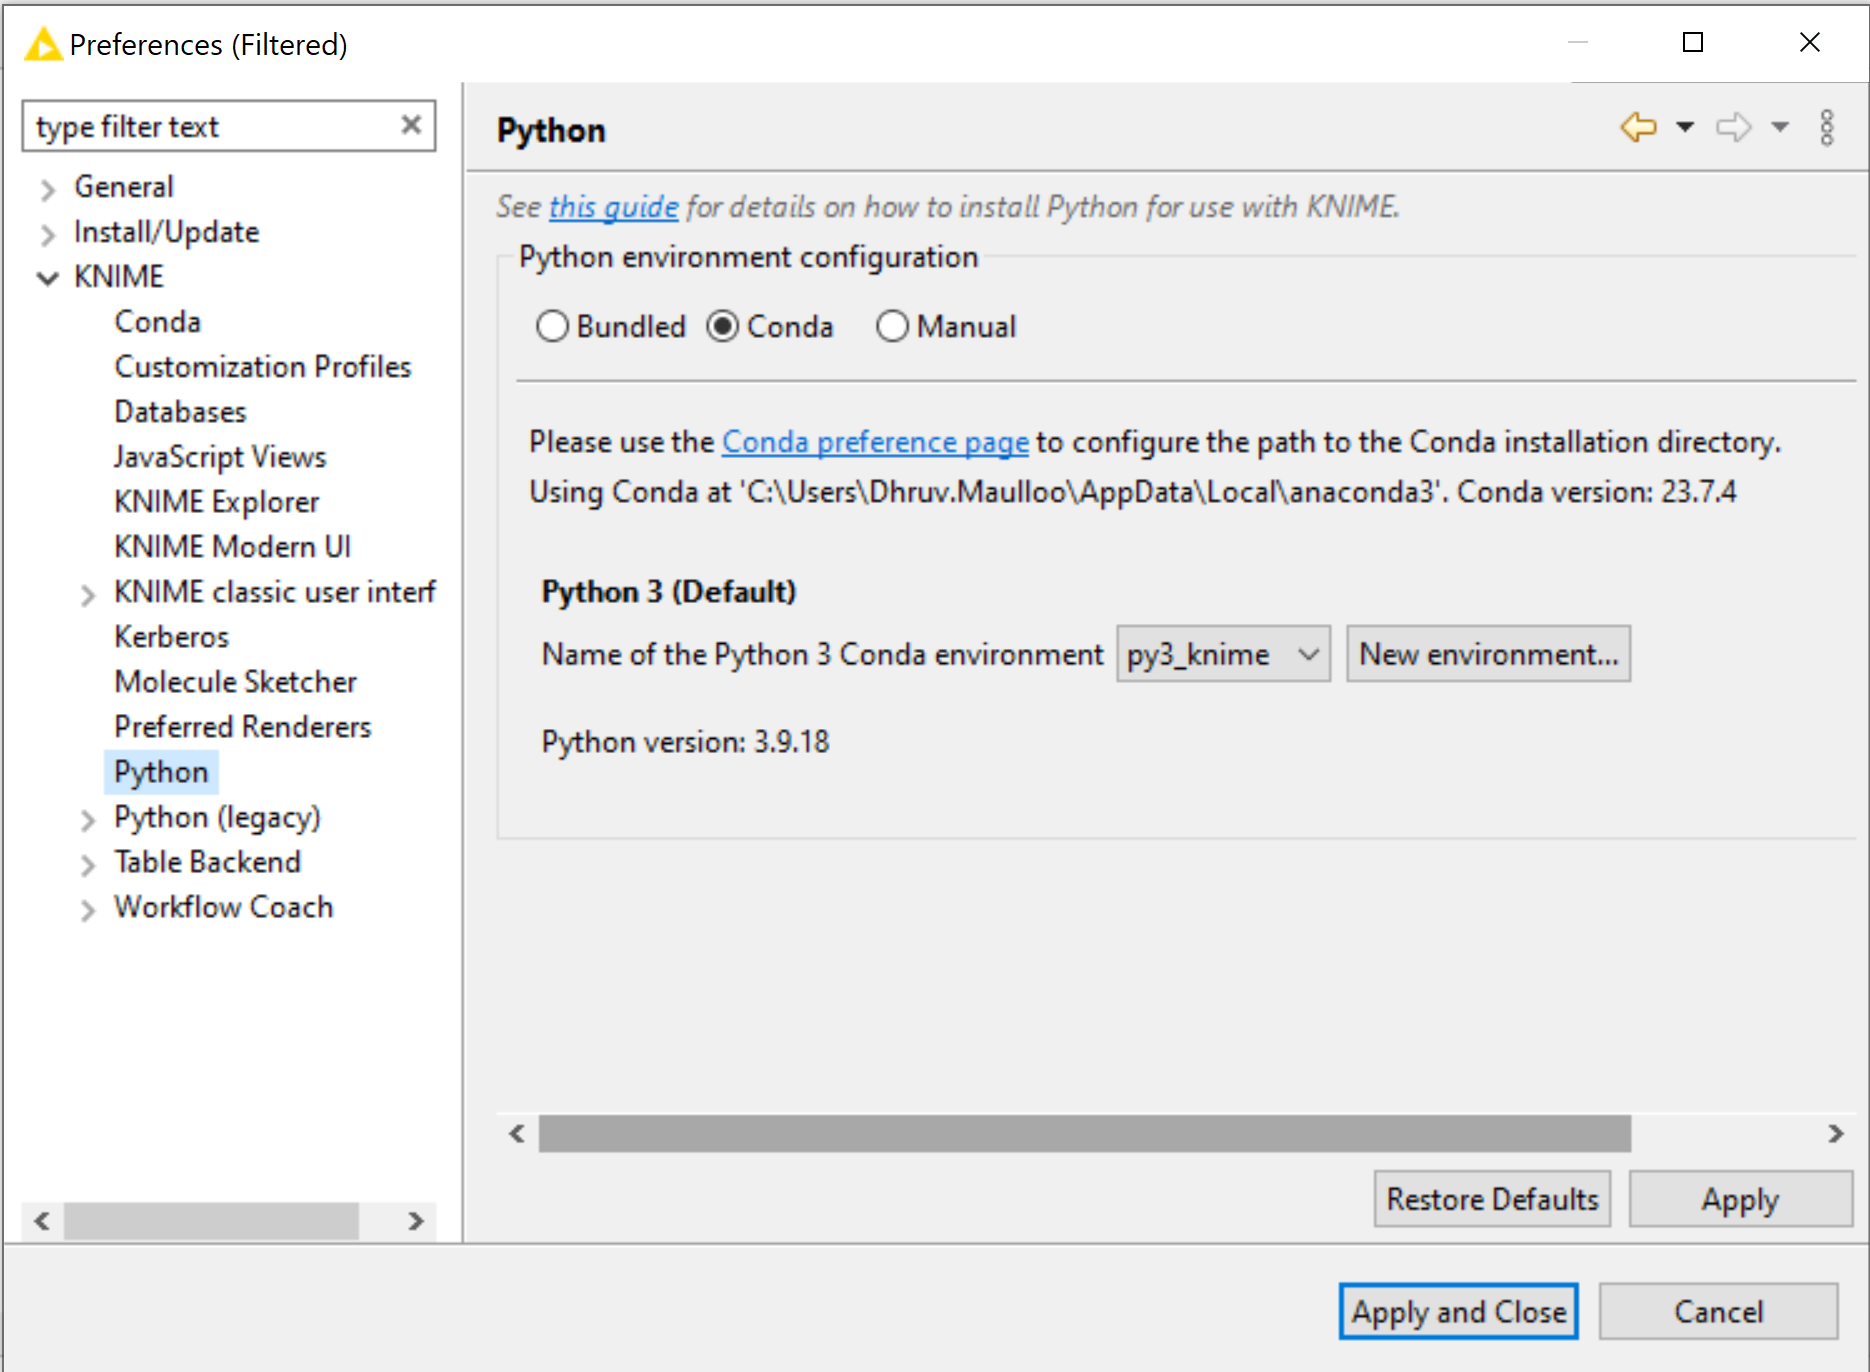
Under Python 3, select the Knime environment you created above.
It is possible that Pyarrow and Numpy packages are in conflict.
That is because the iGrafx SDK Package was installed with pip.
If so, to fix this, they must be reinstalled with conda.
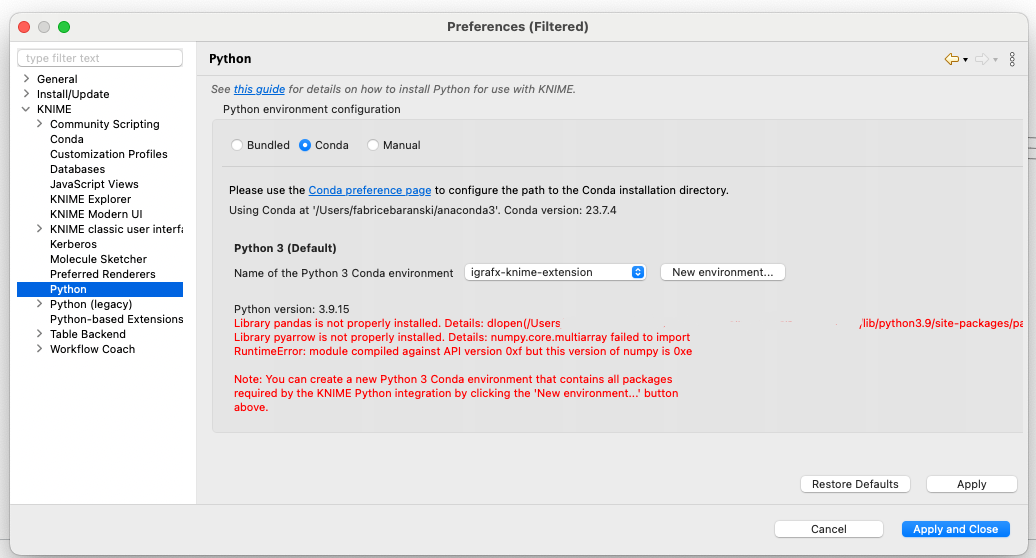
Note that these conflicts can differ, and you should follow the following instructions no matter the package.
First, check the version of both packages with the following commands. If you are on MACOS or Linux, replace findstr with grep:
conda list | findstr pyarrow
conda list | findstr numpy
They will return you something like this, respectively:
pyarrow 9.0.0 py39hca4e8af_45_cpu conda-forge
numpy 1.21.6 py39h6331f09_0 conda-forge
The problematic packages will not have conda-forge written but they will have something else.
Then reinstall the packages with the following commands using the versions that were found with the commands above:
conda install -c conda-forge numpy=<Version that was found>
conda install -c conda-forge pyarrow=<Version that was found>
For instance:
conda install -c conda-forge numpy=1.21.6
conda install -c conda-forge pyarrow=9.0.0
If there are other packages that are problematic, use the same commands but change the name of the package.
Afterwards, restart Knime. Go to the Python Tab in Settings. Reselect the correct environment. If the Python Version is shown, the environment has been set successfully!
Editing the necessary files
Some paths in certain files need modifying so that Knime can detect the Python extension locally.
First, open the config.yml file. it looks like this:
org.igx.igrafx_extension: # {group_id}.{name} from the knime.yml
  src: C:/Users/Path/to/igrafx_extension/igrafx_knime_extension # Path to folder containing the extension files
  conda_env_path:  C:/Users/Path/to/anaconda/python/environment # Path to the Python environment to use
  debug_mode: false # Optional line, if set to true, it will always use the latest changes of execute/configure, when that method is used within the KNIME Analytics Platform
Replace the src field as to specify the path to the igrafx_knime_extension folder.
For instance, it could look like C:/Users/iGrafx/igrafx_extension/igrafx_knime_extension.
Please double check the paths as the most common errors stem from incorrect paths.
Similarly, the conda_env_path field should specify the path to the conda/Python environment created earlier.
To get this path, run the following command in your Terminal/Anaconda Prompt,
and copy the path displayed next to the appropriate environment.
conda env list
The debug_mode is an optional field, which, if set to true,
will tell KNIME Analytics Platform to use the latest changes in the Python node code.
Furthermore, we need to let Knime know where the config.yml is in order to allow it to use our extension
and its Python environment.
To do this, you need to edit the knime.ini of your Knime Platform installation,
which is located at <path-to-Knime>/knime.ini.
Append the following line to the end,
and modify it to have the correct path to the config.yml:
-Dknime.python.extension.config=<path/to/your/config.yml>
Please note that the forward slash / has to be used on all OS, including Windows.
On MacOS, to locate knime.ini, open Finder and navigate to your
installed Applications. Next, right click the KNIME application, select Show
Package Contents in the menu, and navigate to Contents → Eclipse.
The knime.ini file can be edited with any plaintext editor, such as Notepad (Windows),
TextEdit (MacOS) or gedit (Linux).
You can now relaunch Knime. If you type iGrafx in the node Repository, you should find the iGrafx nodes.
Congratulations! The extension has been installed locally. You can now use the iGrafx nodes.