The iGrafx Mining Extension Example
Go to Knime and import the workflow called igrafx_extension_example.knwf.
When the workflow is imported, you should see all iGrafx Extension nodes.
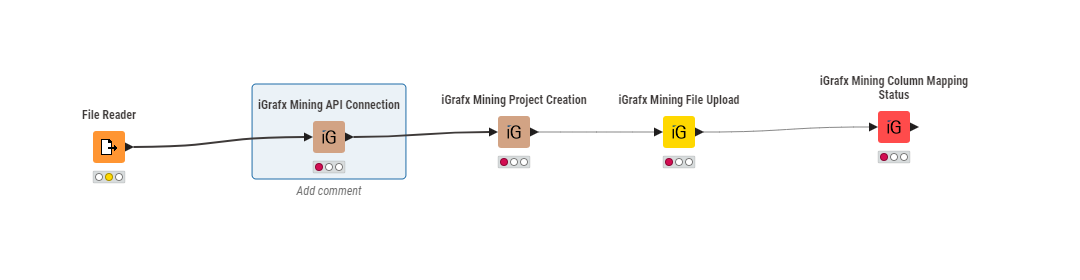
To start using them, look for a File Reader Node. Please note that you may use other nodes as long as the output is a table. Here we use the File Reader Node as an Example. With this node, you will be able to select the file you wish to upload to the iGrafx platform. You can try it with the 100_fake_cases.csv file.
You can then connect it to any node you wish to try, fill in the information by double clicking the node and execute the nodes.
Set your credentials on the iGrafx Mining API Connection node.
Note that the column mapping for the 100_fake_cases.csv file is as follows:
{
   "col1":{
      "name":"case_id",
      "columnIndex":"0",
      "columnType":"CASE_ID"
   },
   "col2":{
      "name":"activity",
      "columnIndex":"1",
      "columnType":"TASK_NAME"
   },
   "col3":{
      "name":"start_date",
      "columnIndex":"2",
      "columnType":"TIME",
      "format":"yyyy-MM-dd HH:mm:ss.SSSSSS"
   },
   "col4":{
      "name":"end_date",
      "columnIndex":"3",
      "columnType":"TIME",
      "format":"yyyy-MM-dd HH:mm:ss.SSSSSS"
   }
}
You can now execute all the nodes.
Once all connected nodes are green, the execution is done.