Duration between tasks
Duration between tasks
The Duration between tasks feature lets you measure the elapsed time between two tasks of your process. Instead of only looking at the total duration of a case, you can focus on a specific portion of the process (for example, the time between Order received and Order shipped) and analyze how it evolves over time.
A duration between tasks can be:
- computed on the fly, directly from the Analysis page, to get an immediate answer, or
- saved as a computed metric, so that it is precomputed and can be reused in the Duration widget and in filters.
On this page:
- Entering the mode
- Selecting the two tasks
- Advanced settings
- Computing the duration on the fly
- Saving a configuration as a metric
- Managing computed metrics
- Using a metric in the Duration widget
- Filtering on a computed metric
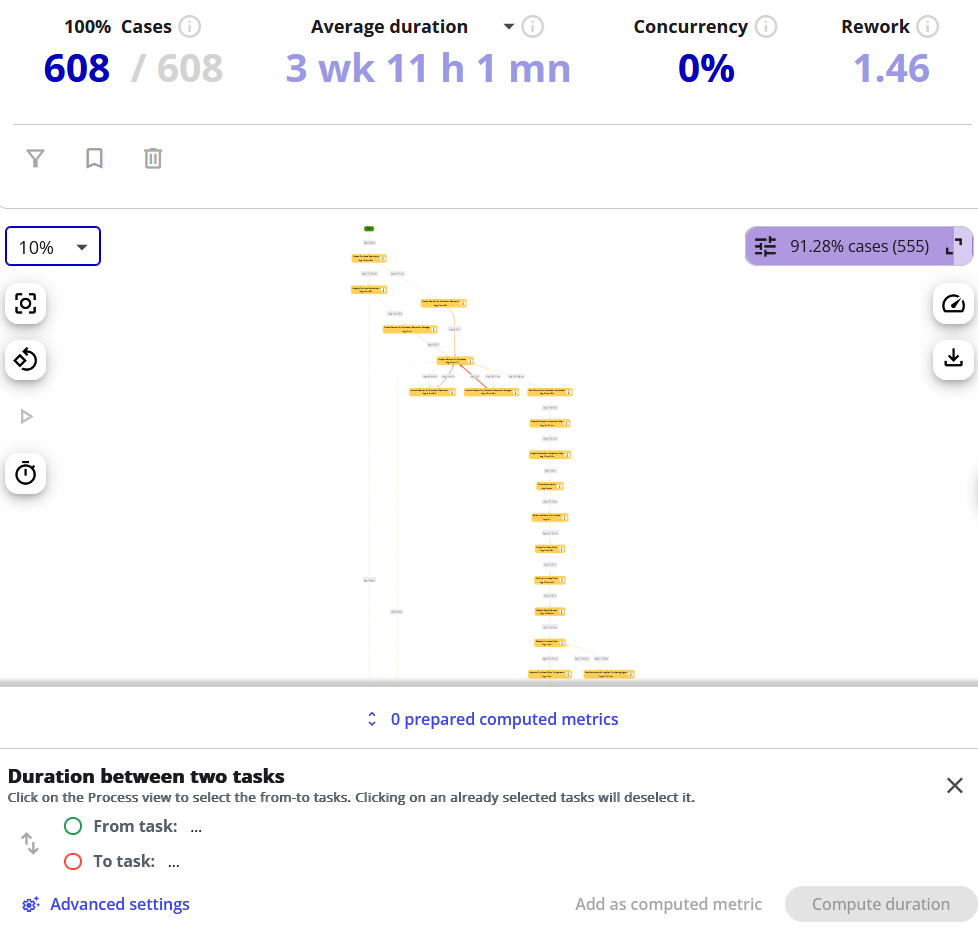
Entering the "Duration between tasks" mode
In the process view of the Analysis page, click the Duration between tasks button to enter the dedicated mode.

Once the mode is active:
- The sections that are not relevant are disabled and greyed out.
- You can still switch between the different views (frequency, duration, …) as usual.
- A dedicated action bar appears at the bottom of the view.
Note: the available actions depend on your role. A Reader can compute a duration between tasks on the fly, while a project Administrator can also save it as a computed metric (see Saving a configuration as a metric).
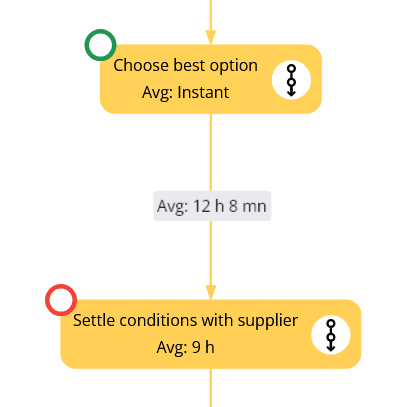
Selecting the two tasks
Click on a first task on the view to define the from task (a green icon appears), then click on a second task to define the to task (a red icon appears). The duration is measured from the from task to the to task.
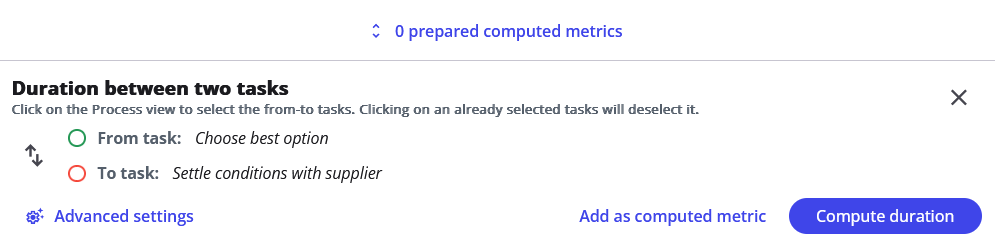
The bottom action bar displays the names of the two selected tasks. From there you can:
- Swap the two tasks (from → to becomes to → from) using the swap button.
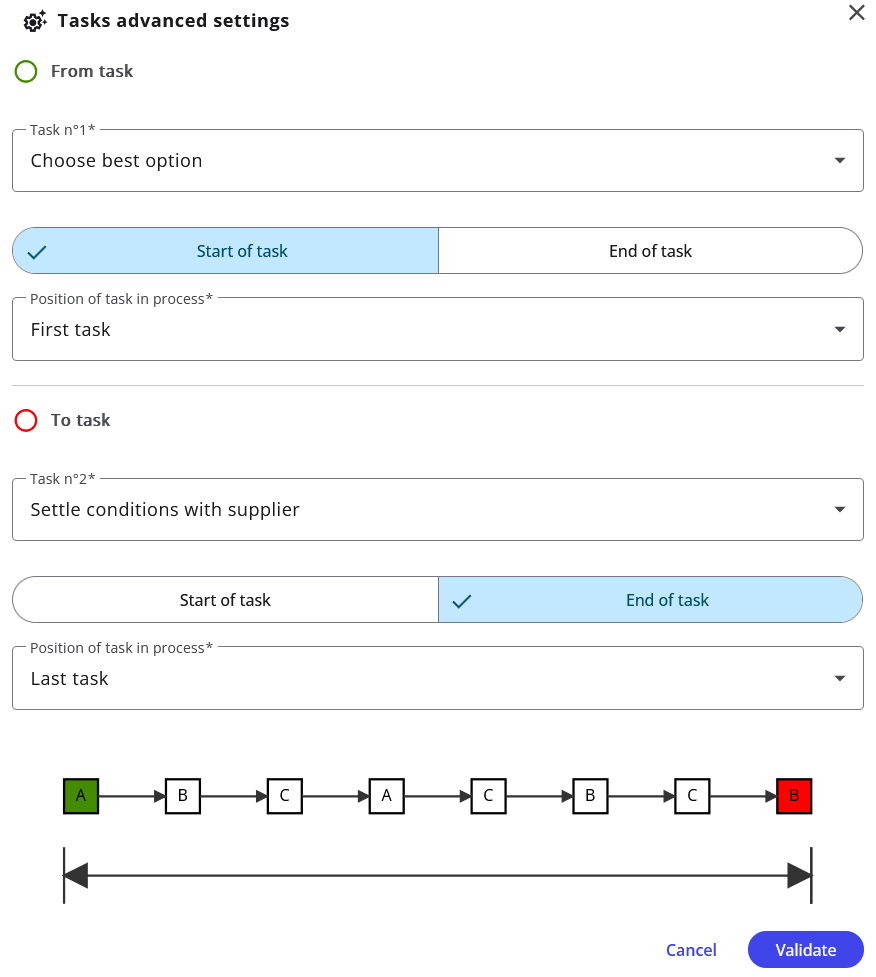
Advanced settings
The action bar also exposes a few advanced settings that refine how the duration is measured.
Occurrence of each task — when a task appears several times in a case, you choose which occurrence to take into account. The options differ for each task, and a small diagram illustrates the one you select:
- From task — its first occurrence, its last occurrence, or all of them.
- To task — its next occurrence (the first one after the from task) or its last occurrence.
Start or end of the task — for each task, you can also choose whether the duration is measured from the start or from the end of the task.
Compute the duration on the fly
Once both tasks are selected, the Compute duration button becomes active. Click it to launch the computation.
The result is shown in a widget that looks just like the cases duration widget. General statistics (minimum, maximum, average and median) are shown at the top to summarize the duration between the two tasks. You can change the statistic, and a decile display is also available.
Note: on large projects, computing a duration on the fly can take a moment. To get faster, reusable results, you can save the duration between tasks configuration as a metric (see Saving a configuration as a metric).
Saving a duration between tasks configuration as a metric
This action is available to project administrators only.
A duration between tasks configuration computed on the fly can be saved as a computed metric so that it is precomputed according to the project data and reused elsewhere in the project — which also avoids recomputing it on the fly every time.
Add a metric
Once the two tasks are selected and their settings set, click the Add as computed metric button and give the metric a name.
Two safeguards prevent duplicates: the name must be unique, and a warning appears if a metric with the same tasks and the same settings already exists.
A badge indicates how many metrics you have added during the current session.
![]()
Review and save the metrics
Click the prepared computed metrics button to open the list of metrics added during the session.
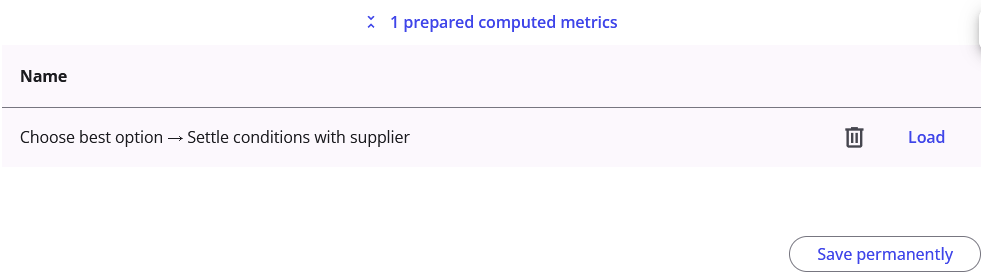
For each entry you can load its configuration to review it, or delete it from the list. When you are ready, click Save permanently to upload all the listed metrics at once. If you leave the page while some metrics are still unsaved, you are prompted to either discard them or save them permanently.
Managing computed metrics
This action is available to project administrators only.
Saved computed metrics can be managed at any time from the project settings, in the Computed metrics: Duration between tasks tab, where a project administrator can create, edit and delete them. Each row shows the metric's name, its two tasks (with their position and whether the start or end is used), the calculation status, and edit/delete actions.
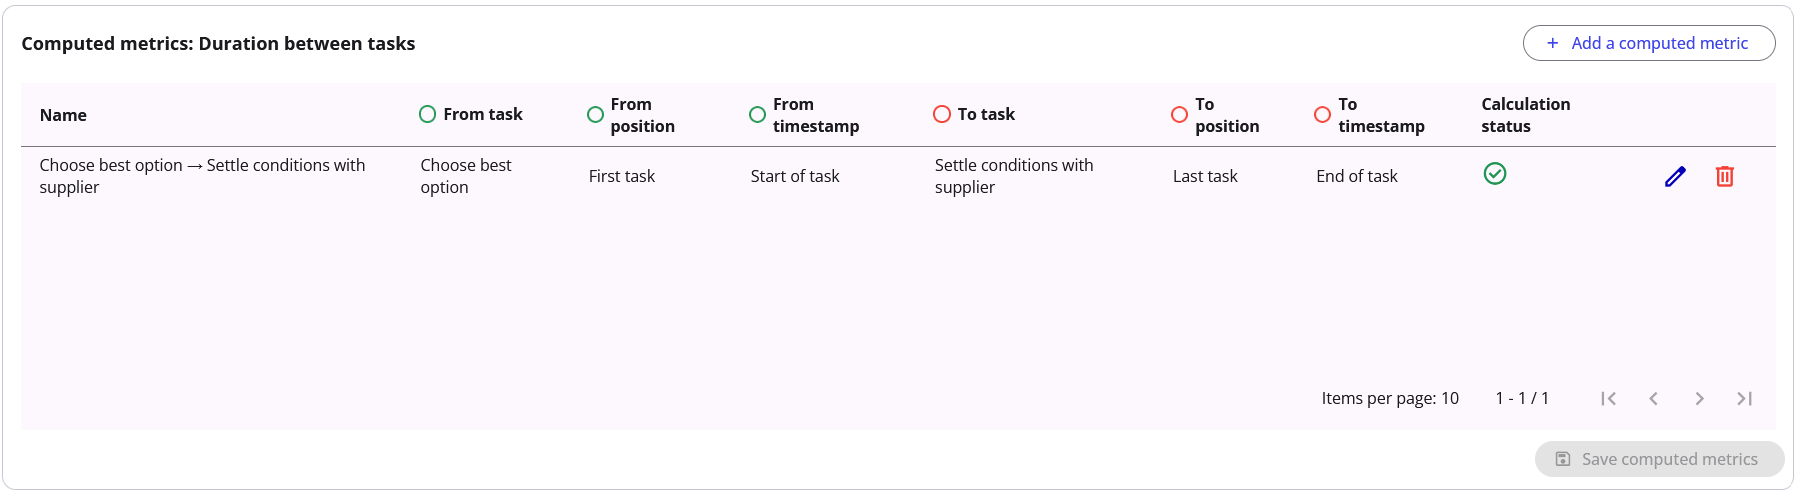
Create a computed metric

Next to the table title, click the button that lets you create a duration between tasks metric directly. It opens a pop-in with a text field for the name and all the fields of the advanced settings (the from task, the to task and the occurrence options).
The same safeguards apply: the name must be unique, and a warning is displayed if a metric with the same tasks and settings already exists.
Edit a computed metric

Click the edit button of the metric you want to modify. The pop-in reopens with the values pre-filled, allowing you to change the name and the advanced settings of the metric.
A warning is displayed if the new name already exists and/or if the settings are already the same as an existing metric.
Delete a computed metric

Click the delete button of the metric you want to remove. A confirmation pop-in asks you to validate the operation.
Note: a metric that is used in a saved filter, a dashboard widget or a custom investigation cannot be deleted. Delete the reference first if you want to delete the metric.
Save changes
The actions you perform in this tab (creation, edition, deletion) are applied together when you save your changes.
Using a computed metric in the Duration widget
Once a duration between tasks metric has been computed, it becomes available in the Duration widget of the Analysis page, Cases tab.
The widget title becomes a selection field:
- The first item is always Duration (the default case duration).
- Below, grouped under Computed metrics: Duration between tasks, you find your saved metrics, each shown by its name. A metric that is still being computed does not appear yet — only the available ones are listed.
Selecting Duration keeps the widget's default behavior. Selecting a computed metric displays the timeline and statistics for that metric instead. The result matches the one computed on the fly, but loads much faster on large projects since it relies on pre-computed data.
As with the regular Duration widget, opening it in large lets you change the statistic and the aggregation, and switch to the decile view.
Filtering on a computed metric
A computed metric can also be used to create a filter, so you can keep only the cases whose duration between the two tasks meets a condition.
When you create a filter, your available metrics appear in the filter type list, grouped under Computed metrics: Duration between tasks. Pick one to filter on it.
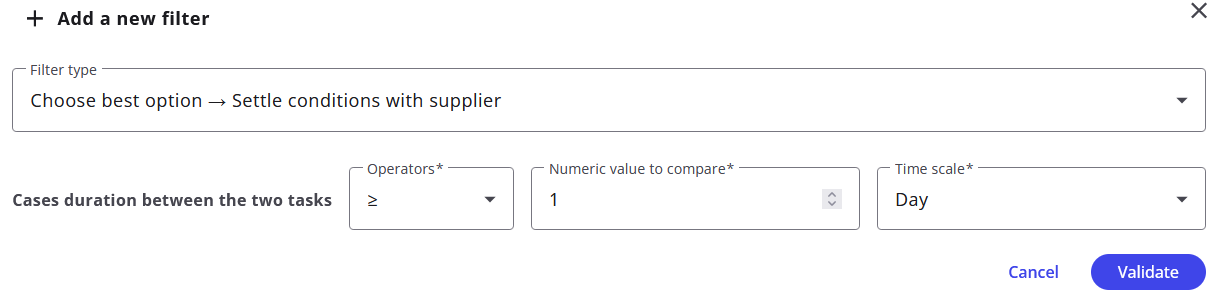
The filter offers the same controls as the standard Duration filter: an operator, a value and a time scale. For a given case, if any duration between the two tasks satisfies the condition, the case is kept — for example, keep the cases where a duration between the two tasks is greater than or equal to 1 day.
Like any other filter, it can be saved as a set of filters and used to filter dashboard widgets or in custom investigations.